In a world where freshness and nutrition are becoming daily priorities, microgreens have emerged as the perfect home-grown solution. These tiny, nutrient-packed shoots are not only easy to grow but also add a burst of flavor and health to your meals. And the best part? You can cultivate them right in your Indian kitchen, balcony, or windowsill—in just 10 days.
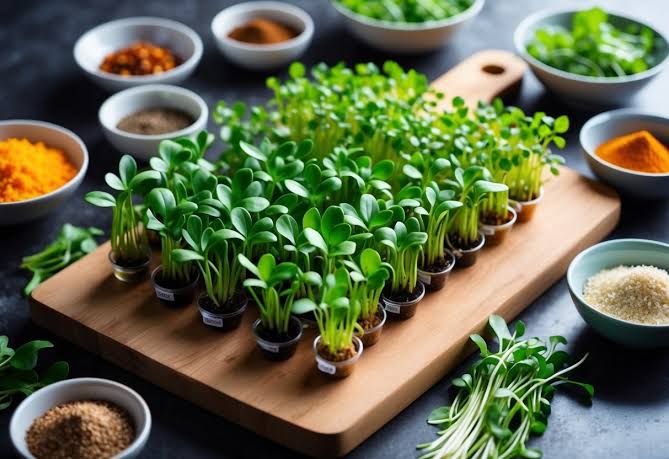
Microgreens are the young seedlings of vegetables and herbs, harvested when they are about 1 to 3 inches tall. Popular among urban households, they require minimal space, no fancy equipment, and very little effort. Whether you’re in a metro apartment or a small town home, growing microgreens is a rewarding and sustainable way to elevate your diet.
Getting Started With The Basics
• Choose your seeds wisely. Fenugreek (methi), mustard, coriander, radish, sunflower, and wheatgrass are ideal for Indian climates and beginner-friendly.
• Opt for untreated, organic seeds to ensure safe consumption and better germination.
• You don’t need expensive trays. Old baking dishes, shallow plastic boxes, or even unused tiffin lids work well. Just make sure they have drainage holes.
Step-By-Step Guide To Growing Microgreens
1. Prepare your growing tray by adding a thin layer of cocopeat or regular potting soil. This acts as the base for your seeds.
2. Soak seeds overnight—mustard for 6 hours, sunflower for up to 12 hours. This helps activate germination.
3. Scatter the soaked seeds evenly across the soil surface. Press them gently but don’t bury them deep. Cover with a light layer of cocopeat.
4. Mist the surface with water using a spray bottle. Avoid overwatering. Cover the tray with a lid or cloth to create a dark, moist environment.
5. After 2 days, you’ll notice tiny white shoots emerging. At this stage, remove the cover and place the tray near a window with indirect sunlight.
6. Continue misting daily. By day 7 to 10, your microgreens will be ready to harvest once they develop their first true leaves.
Why Microgreens Are A Nutritional Powerhouse
• Microgreens contain up to 40 times more nutrients than their mature counterparts. They are rich in vitamins A, C, E, and K, along with antioxidants and minerals.
• They help boost immunity, improve digestion, and support skin health.
• Ideal for weight management, they add bulk and fiber without calories.
You can add them to salads, sandwiches, smoothies, or even Indian dishes like poha, upma, and parathas. Their mild flavor and tender texture make them versatile and easy to incorporate.
Tips For Indian Homes And Climate
• Place trays near east-facing windows for morning sunlight. Avoid harsh afternoon rays.
• In humid regions like Goa or Kerala, ensure good air circulation to prevent fungal growth.
• During monsoons, use artificial light or LED grow lamps if natural light is limited.
• Reuse trays and rotate crops every 10 days for a continuous supply.
Beyond Nutrition: A Lifestyle Shift
Growing microgreens is more than a health trend—it’s a lifestyle choice. It encourages mindful eating, reduces dependency on store-bought greens, and reconnects you with nature. For families, it’s a great way to introduce children to gardening and sustainability.
Urban gardeners are now turning their balconies into edible green corners, and microgreens are leading the charge. With minimal investment and maximum returns, they’re the perfect entry point into home farming.
Final Thoughts
In just 10 days, you can transform a corner of your home into a mini farm that feeds your body and soul. Microgreens are proof that good health doesn’t need a garden—just a little care, sunlight, and patience.
Sources: The Daily Jagran, AllThatGrows, Naturally Green India.